In the Kitchen

chili

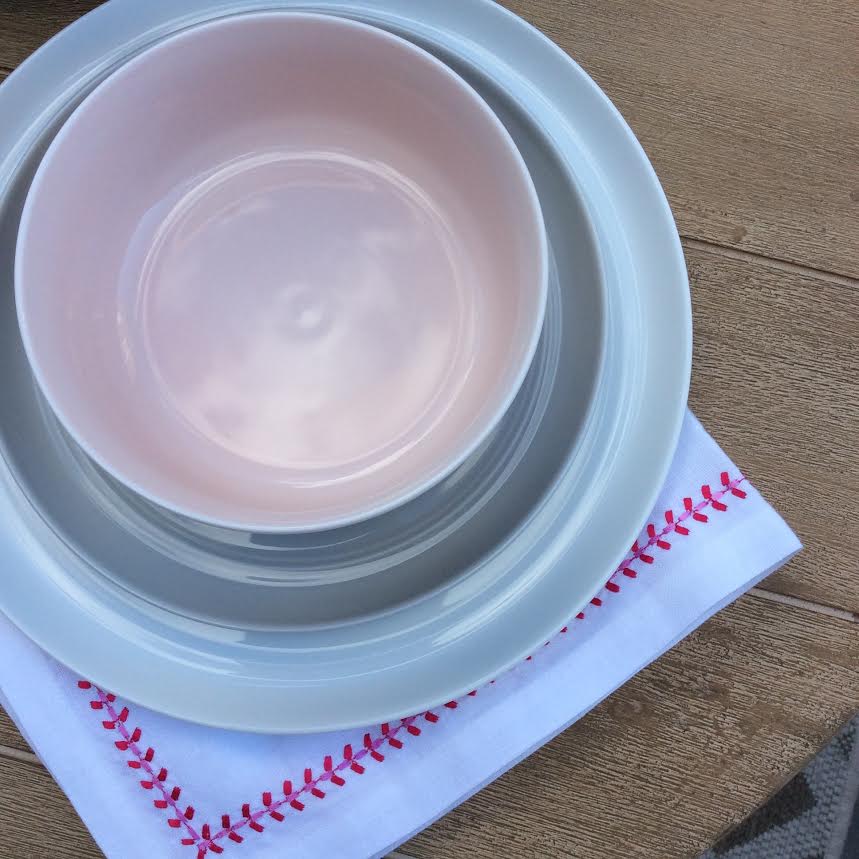
Is everyone else freezing today?! My goodness, winter certainly has arrived. To help add a bit of warmth to you and your homes, I wanted to share one of my favorite chili recipes. I found the recipe last year on Feed Me Phoebe. I have made it my own by making a few slight modifications. All in, this recipe takes about an hour to make. I promise, it is worth it!

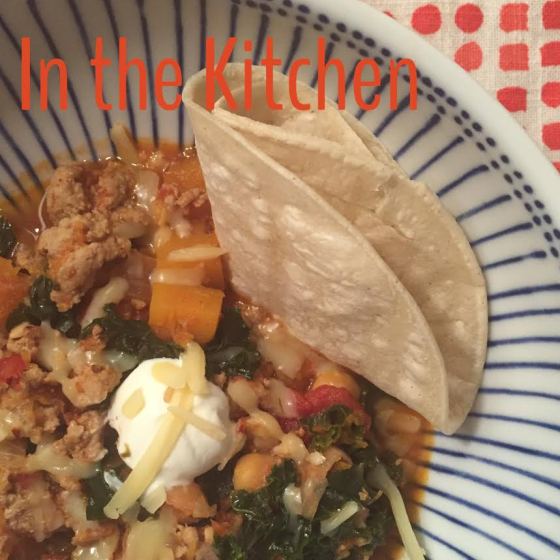
Moroccan Chili with Sweet Potatoes, Chickpeas and Kale

Ingredients

  • 2 Tbs. olive oil
  • 1 medium onion, finely diced
  • 1 lb. ground turkey
  • 3 garlic cloves, minced
  • 2 Tbs. harissa
  • 2 tsp. ground cumin
  • 2 tsp. sea salt
  • 1 28 oz. can diced tomatoes {I always use San Marzano}
  • 1 15 oz. can chickpeas {drained and rinsed}
  • 3 cups diced sweet potato
  • 2 cups water
  • bunch of fresh kale
  • 1 lemon

Directions

In a large Dutch oven, heat the oil and saute onions over medium heat until soft. This usually takes about 5 minutes. Push the onions to the side of the pan and add the ground turkey. Cook the meat, breaking apart with a wooden spoon until browned and cook through. The onions will become incorporated as your brown the turkey. Add the garlic, harissa, cumin and sea salt and cook for 1 minute or until the spices have become fragrant.  Pour in the tomatoes {with the juice} and cook for about 15 minutes. Stir frequently and make sure to scrap up all the brown bits at the bottom of the pan. This is where the flavor is!

After the mixture has reduced, add the chickpeas, sweet potato, and kale. For the kale, I usually buy a bunch at the store and just tear the leaves off the stem. I think it works out to be about 3 cups when said and done. Bring chili to a boil, turn the heat to low, and simmer uncovered for about 20 minutes or until the sweet potato is tender and the chili has thickened.

Before serving, add in the juice of 1 lemon. To serve, I add in a little sour cream, grated cheese and finish off with a warm corn tortilla.

In the Kitchen

unnamed (1)

57 weeks ago I posted the above photo on Instagram of one of my favorite soup, promising to share the recipe soon. Since today is the first day of fall, I thought today would be the perfect day. I’ve been making this soup for nearly 15 years now as it is super easy and super delicious. Plus, it has a pretty high wow factor.

French Fish Chowder

*slightly modified from New York Times recipe

  • 1 lb. cod fillets
  • 3 Tbs olive oil
  • 1/2 cup finely chopped onion {1 medium onion}
  • 1 cup chopped celery {usually about 3 stalks}
  • 1 cup diced red pepper {1 red pepper}
  • 1 Tbs. minced garlic
  • 2 tsp. turmeric {an Indian spice with cancer fighting power}
  • 1 cup dry white wine
  • 1 28 oz. can crushed tomatoes
  • 1 bay leaf
  • 2 sprigs of thyme
  • 1/4 tsp. red pepper flakes
  • 4 cups of broth {fish, vegetable or chicken}
  • 1/2 cup orzo

Directions

  1. Cut fish into 1-inch cubes.
  2. Heat oil in large saucepan {I use my dutch over} and add onions, celery, red pepper and garlic and cook over medium heat for about 5 minutes. Stir occasionally.
  3. Add turmeric, wine, tomatoes, bay leaf, thyme, pepper flakes, broth, and season a little with salt and pepper. Bring to a boil and simmer for 5 minutes.
  4. Add the orzo, stir well and simmer for about 8 minutes.
  5. Add in the fish and return soup to a boil. Remember to remove the bay leaf.

I like to finish the soup with about a tablespoon of cream and a dash of curry powder. I serve with grilled french bread rubbed with olive oil and garlic. I think the soup tastes better with a little time to rest so I tend to make the base ahead of time and just bring to a boil a few minutes before serving and then add the fish.

Give it a try and let me know what you think!

Found

unnamed (1)

My move back to Boston last summer was quite easy as I had very few things. You see, when I end a chapter, I tend to purge and thus beginning a new chapter means sourcing many new things. As one who loves to entertain, I knew finding the perfect dinner set would take a little time. Luckily it didn’t take as long as expected thanks to Crate and Barrel’s Hue Collection… this week’s found item.

Created by London-based designer Aaron Probyn, this contemporary porcelain collection is hand-glazed in seven soft, soothing hues. Since Ina Garten always told me {on her show, of course} to use a white dinner plate to allow the food takes center stage, I opted for a classic white dinner plate but added color with the light grey salad plate and blush bowl. I just love the mix-and-match nature of this collection. And the price point, you can’t go wrong!

Just take a look at the color options.

unnamed (3)

Looking to add a little color to your dinner table? I can’t say enough about this week’s found item. I hope you all enjoy this last week of August enjoying good food, family and friends. I’ll see you on Monday!

In the Kitchen

kitchen
When hosting a dinner party, I try to keep my appetizers fairly simple. A beautiful crudite board with green goddess dressing or a cheese board bursting with bread, grapes and of course cheese {my rule of thumb is three: a hard, a soft and a really smelly one}. In addition, though, I always like to add a wow bite. And for me, those more often than not are Ina Garten’s Gruyère Cheese Puffs. The first time K tried these, she asked “are these homemade?” To which I responded, “Sweetie, I only make homemade.” As you can imagine, this is now a running joke in our home.

Don’t let the above photo scare you. These cheese puffs are super easy to make, I promise.

Ina’s Gruyère Cheese Puffs

  • 1 cup milk {I use whole milk for the flavor but any milk will do}
  • 1/4 lb unsalted butter {I always use unsalted butter when baking}
  • 1 tsp. salt
  • pinch of black pepper
  • pinch of freshly grated nutmeg
  • 1 cup all-purpose flour
  • 4 extra-large eggs {make sure your eggs are at room temperature}
  • 1/2 cup grated Gruyère cheese, plus extra for sprinkling
  • 1/4 cup freshly grated Parmesan cheese

Directions

  1. Preheat over to 425 degrees. Line a baking sheet with parchment paper.
  2. In a saucepan, heat the milk, butter, salt, pepper and nutmeg over medium heat, until scalded. Add the flour all at once and beat vigorously with a wooden spoon until the mixture comes together. Cook the mixture, stirring constantly, for about 2 minutes. The flour will begin to coat the bottom of the pan.
  3. Pour this mixture into your kitchen aid mixer bowl and immediately add the eggs, Gruyère and parmesan and mix until eggs are incorporated and the dough is smooth and thick.
  4. Spoon the mixture into a pastry bag {I use a large zip lock bag and cut off one corner}. Pipe onto the lined baking sheet in a round {similar in size to a golf ball}. With a wet finger, lightly press down the swirl at the top of each puff. Brush the top of each puff lightly with egg wash {made with 1 egg and 1 tsp. of water whisked} and top with a pinch of Gruyère cheese.
  5. Bake for 15 minutes, or until golden brown.

Voila! You are done. Give them a try and let me know if you house guests love them as much as mine!

In the Kitchen

IMG_0862

#TacoTuesday has become a tradition at Melrose Place {our city abode}. At least twice a month, on Tuesday of course, I try a new taco recipe. I have about a 95% success rate, with one tragic night taking place a few weeks back with a Jamaican jerk chicken recipe. K’s favorite thus far was a honey-lime sweet potato, corn and black bean recipe.

Sometimes, though, I just crave a basic taco like the ones my mom use to make using the Ortega taco dinner kit. Since my mom doesn’t eat meat, she would use ground turkey. I have realized, though,  that those little seasoning packages just aren’t  a good idea. With a little research, and keeping my spice cabinet full of delicious blends from Ambrosia {an island must}, I developed my own taco seasoning. Mix 2 tablespoons of this with ground turkey, a can of garbanzo beans and some kale, and you have yourself a healthy and delicious taco.

May’s Taco Seasoning

1/2 tsp. garlic powder

1/2 tsp. onion powder

1/2 tsp. dried oregano

1/2 tsp. black pepper

2 Tbs. chili powder

1 tsp. paprika

1/2 tsp. red pepper flakes

1 tsp. sea salt

1 Tbs. ground cumin

In my opinion, the key to a great taco are all the fixings. Soft corn tortillas, avocados, chopped tomato, shredded cabbage, cilanto and cotija cheese are terrific additions. Give this a try. I promise, you’ll be having a #tacotuesday tradition soon enough!

In the Kitchen

photo

Happy Friday, friends! First off, I just want to thank you for your beautiful words regarding yesterday’s post. I am truly humbled and feeling quite blessed for having all of you in my life. Now onto my other love, entertaining.

Today I wanted to share my menu from a recent sips + snacks party we held on the deck. In my 12 years of city living, I’ve never had a deck. And now, K and I have a deck the size of our bedroom, which makes outdoor entertaining a must {especially after the winter we had}!

For cocktail parties, I like to keep the menu simple* with items that can be served at room temperature and are easily replenishable. I have been on a mezze kick as of late and thus decided to do a spread of four different mezze/dips with crudité. Each and every time I am putting together a party menu, my first go-to is my collection of Ina cookbooks. I decided on her Tzatziki and baba ganoush but knew I needed to add one or two more. While perusing Pinterest for inspiration, I found a beet root hummus and Moroccan spiced roasted carrot dip, which both turned out to be my favorite. K said the carrot dip was a pleasant surprise.

Dips always need a “vessel” (a term of endearment from my catering days) and thus I had plenty of pita on hand and a selection of crudité. I blanched the asparagus for 3 minutes in boiling water and then placed them immediately in an ice bath to stop the cooking. The result is a perfectly crisp and bright green asparagus spear. For the carrots, I did a simple peel and chop and then placed them in a plastic container with water. This helps to keep the carrots crisp. I quartered the radishes and did an ever so slight sprinkle of salt on top. And for the green beans and squash, a simple chop was all they needed. Next time around, I might omit the green beans and instead do some cucumber spears.

Another catering trick {which is oh so helpful for your guests}, label your food. I had these Moglea watercolor tags on hand and the colors matched our mezze spread perfectly. A little bakers twine around the jelly jars and voila!

I included my *asterisk above because although this spread of mezze was technically easy, it was a bit time consuming. In the end, though, well worth it. Looking to entertain this summer, I highly recommend this delicious and beautiful mezze spread.